Snippets v4.3
Snippets are reusable code templates that save you from retyping the same patterns over and over. Need a DataList with an ItemTemplate? A dropdown populated from a database? An email notification on form submission? There's a snippet for that — and if there isn't, you can create your own in seconds.
XMod Pro v5 ships with a library of built-in snippets covering the most common patterns for forms, views, and feeds. You can also create your own snippets through the Snippet Manager — no file editing required.
Using Snippets
Snippets are available in two places within the code editors:
From the Reference Panel
Open the Reference Panel (click the book icon in the toolbar or press Ctrl+Alt+R / Cmd+Alt+R). Your snippets appear in two sections:
- My Snippets — Snippets you've created
- Built-in Snippets — Snippets that ship with XMod Pro
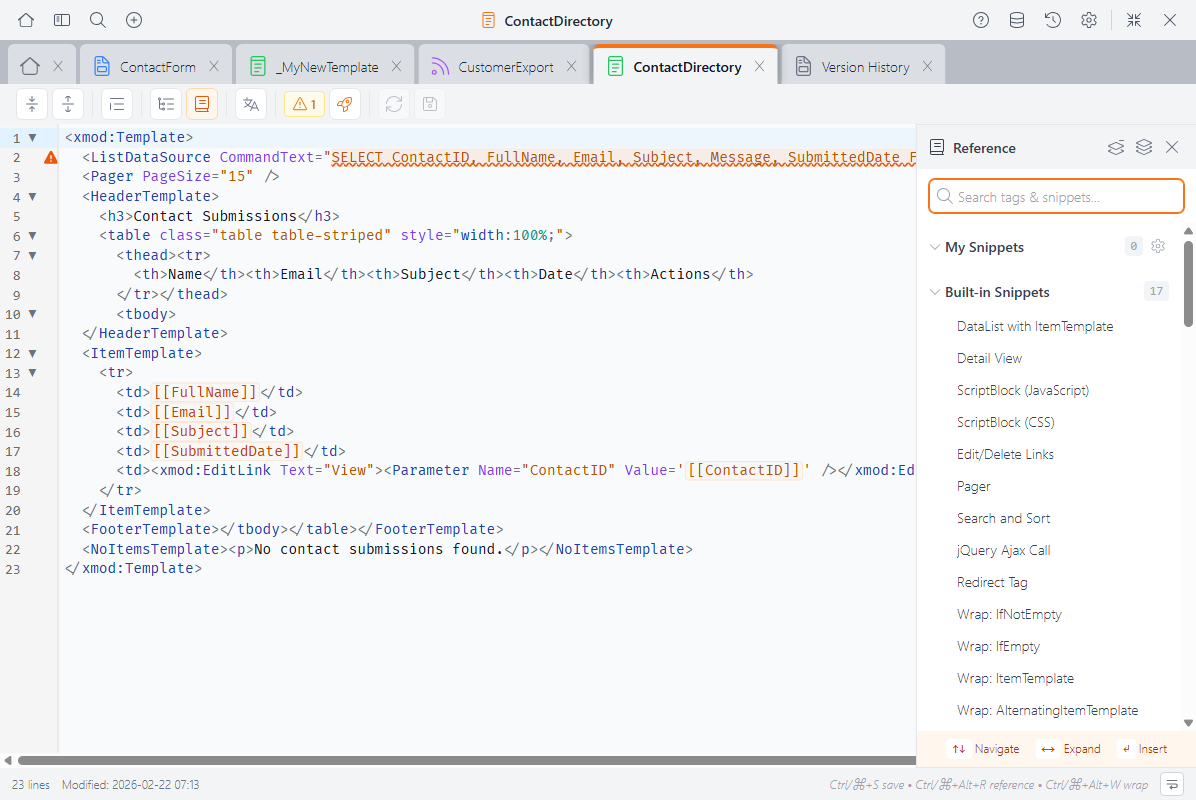
Click any snippet name to insert it at the cursor position in the editor. The Reference Panel filters snippets to show only those relevant to what you're editing — form snippets when editing a form, view snippets when editing a view, and so on.
From Autocomplete
Snippets also appear in the editor's autocomplete suggestions as you type.
Tabstop Placeholders
Many snippets include tabstop placeholders — highlighted fields you can tab through to quickly customize the inserted code. For example, when you insert a TextBox snippet, the cursor lands on the first placeholder (the ID), and pressing Tab moves to the next one (the DataField):
<TextBox Id="${1:txtField}" DataField="${2:Field}" DataType="string" />After insertion, txtField is selected and ready to edit. Press Tab to jump to Field, and so on. This lets you fill in the details without manually positioning your cursor.
Managing Snippets
Click the gear icon next to "My Snippets" in the Reference Panel to open the Snippet Manager.

The Snippet Manager lets you:
- Create new snippets
- Edit your existing snippets
- Delete snippets you no longer need
- Duplicate any snippet (including built-in ones) as a starting point for your own
- Preview a snippet's code without inserting it
- Filter by context (Form, View, Feed, or All)
Creating a Snippet
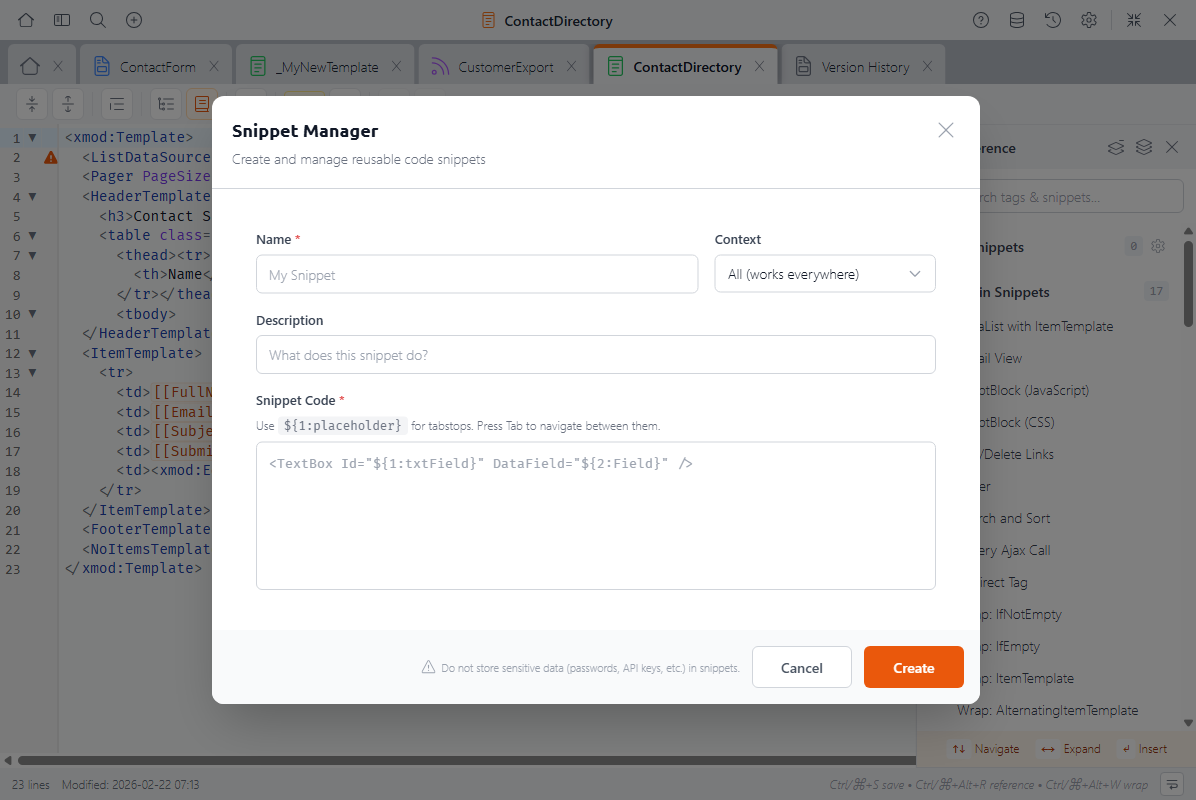
Click New Snippet in the Snippet Manager and fill in:
- Name — A descriptive name (must be unique)
- Context — Where this snippet should appear:
- Form — Only in the form editor
- View — Only in the view editor
- Feed — Only in the feed editor
- All — In all editors
- Description — A brief note about what the snippet does (optional but recommended)
- Code — The snippet content, optionally including tabstop placeholders
Tabstop Syntax
Use ${1:placeholder} for the first tabstop, ${2:placeholder} for the second, and so on. When the snippet is inserted, the user can press Tab to jump between placeholders. For example:
<DropDownList Id="${1:ddlField}" DataField="${2:Field}" DataType="string">
  <ListItem Value="${3:value}">${4:Display Text}</ListItem>
</DropDownList>WARNING
Do not store sensitive data like passwords, API keys, or connection strings in snippets. Snippet content is stored in a configuration file on the server.
Built-in Snippets
Built-in snippets cannot be edited or deleted, but you can duplicate any built-in snippet to create your own editable copy. This is a great way to start with a known pattern and customize it for your needs.
Built-in Snippet Library
XMod Pro v5 includes snippets for the most common tasks:
Form Snippets
| Snippet | Description |
|---|---|
| Text Field with Label | A TextBox with a label and required validation |
| Dropdown from Database | A DropDownList populated from a database table |
| Email Notification | Send an email when the form is submitted |
| Validation Summary | Error display area for form validation messages |
| Submit & Cancel Buttons | Standard Add/Cancel button pair |
| Cascading Dropdowns | Two linked dropdowns where the second filters based on the first |
| Conditional Panel | A panel that shows or hides based on a condition |
| File Upload | A file upload control with validation |
View Snippets
| Snippet | Description |
|---|---|
| DataList with ItemTemplate | A basic list view structure with data source |
| Detail View | A detail template with its own data source |
| ScriptBlock (JavaScript) | Inject client-side JavaScript into the page |
| ScriptBlock (CSS) | Inject CSS styles into the page |
| Edit/Delete Links | Standard edit and delete action links |
| Pager | Pagination control for list views |
| Search and Sort | A search and sort control with field configuration |
Feed Snippets
| Snippet | Description |
|---|---|
| Basic JSON Feed | A JSON feed with data source and output configuration |
Universal Snippets (All Contexts)
| Snippet | Description |
|---|---|
| jQuery Ajax Call | An AJAX call to an XModPro feed |
| Redirect Tag | Redirect the user to another URL |
| Comment Out Code | Wrap code in XMP comment syntax [-- --] |
| Region | Wrap code in a collapsible #region block |
| Several "Wrap" snippets | Quick wrappers for IfNotEmpty, IfEmpty, ItemTemplate, Div, and more |
Migrating from v4.x
If you're upgrading from v4.x, your existing snippets.js file will be automatically migrated to the new snippets.config format the first time XMod Pro loads it. A backup of your original file is saved as snippets.js.migrated. No action is required on your part.
Next Steps
- Code Editors — The editors where snippets are used
- Control Panel — Overview of the XMod Pro Control Panel