So far in this lesson we've Created our Form using the Form Builder and Configured our module to use it. It's all well-and-good to have a form on your site, but what's to prevent someone from simply clicking the submit button without giving your their name or email? You'd have no way to contact them.
In this lesson we'll be adding validation so that your users will need to fill out their name and their email address in order to submit the form. We'll cover two validators - the Required Field Validator and the Email Validator.
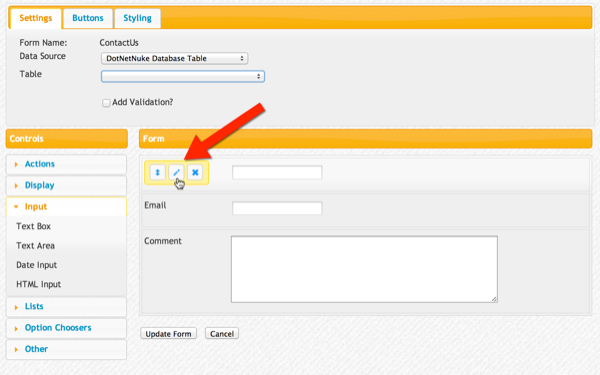
- First, let's open our form back up to edit it. Go to the Control Panel, locate the "ContactUs" form, and click the Pencil icon next to its name to edit the form.
- Once you've done that, hover your mouse over the Name textbox control in the canvas as shown below. This will pop-up a mini-toolbar. Click the Pencil icon to edit that control:
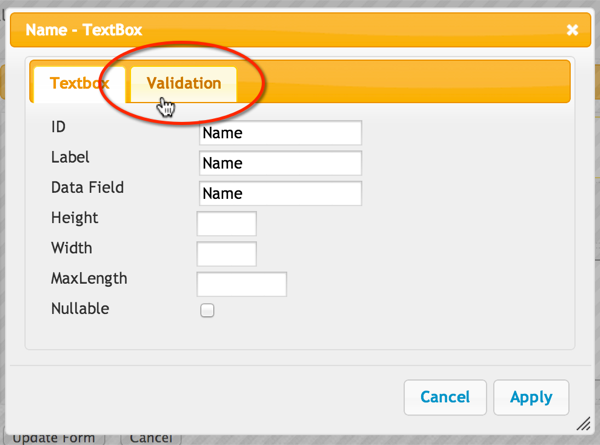
- This brings up the Name control's tag designer. On the designer, click the "Validation" tab:
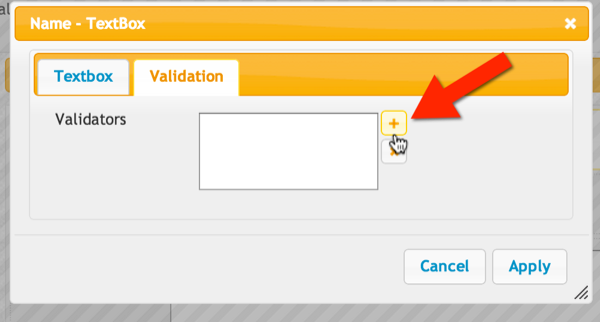
- The validation tab allows you to add one or more validators to this control. In our case, we're going to add a Required Field Validator so that the user is forced to enter his or her name. Click the "+" icon to add a new validator:
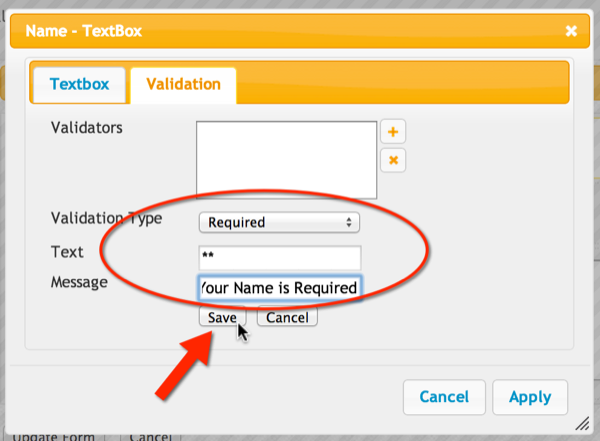
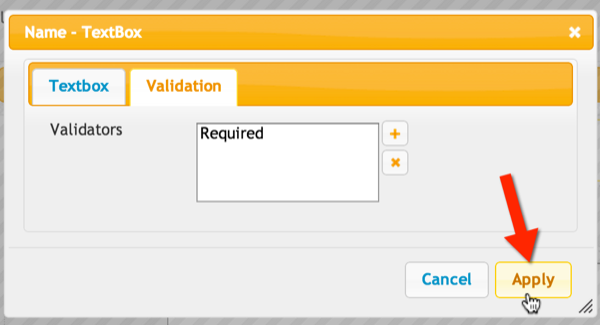
- Next, select "Required" from the Validator Type drop-down, enter two asterisks to the "Text" field, and add an error message. The Text property's value will be displayed next to the control if validation fails. It's purpose to visually draw the user to the control that has a problem. I usually use two asterisks, but you can use whatever you'd like. The "Message" property is a more complete error message that will be displayed to the user in the Validation Summary (more on that later) describing exactly what the problem is. In this case I added "Your Name is Required". Once you've entered that information, click the "Save" button to add the validator to the list.
- Finally, click the Apply button to save your changes
- Now let's take care of the Email input control. We want to require that the user fill out the field, but we also want to ensure the value is a validly formatted email address. If you looked at the full list of Validators in the previous step, you will have noticed an Email validator. If you choose to use this validator WITHOUT the Required validator, then the user will not be forced to enter an email address at all. The Email validator (and most others) only operate on the control if there is a value. This allows you to have optional values in your form. So, if you don't want to require an Email address, but want to ensure that, if entered, the address is valid, you would use just the Email validator. In our case we also want to force the user to enter an Email address.
In the example below, you can see I've already added a Required Field Validator. I then pressed the "+" button to add a new validator, selected Email as the Validation Type and filled in the rest of the information. The text is two asterisks as in the Name validator. The Message is "Please enter a valid email address". When you've filled out the information, click the Save button to add it to the Validators list.

- Now click the Apply button to save your changes
- Since we want the Comment field to be optional and free-form text, we don't need to add any validation there. Go ahead and click the "Update Form" button at the bottom of the Form Canvas to save your changes:
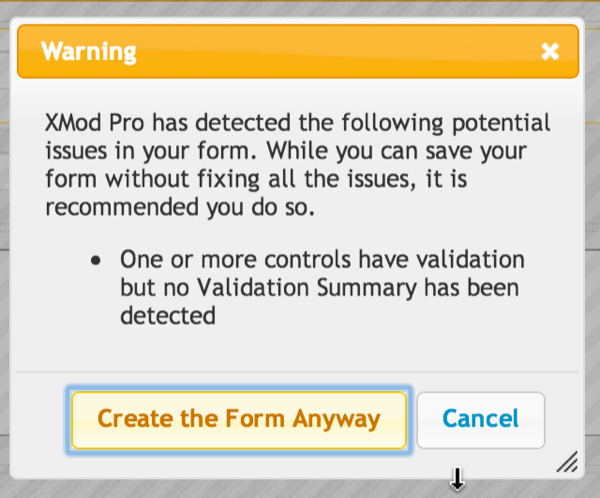
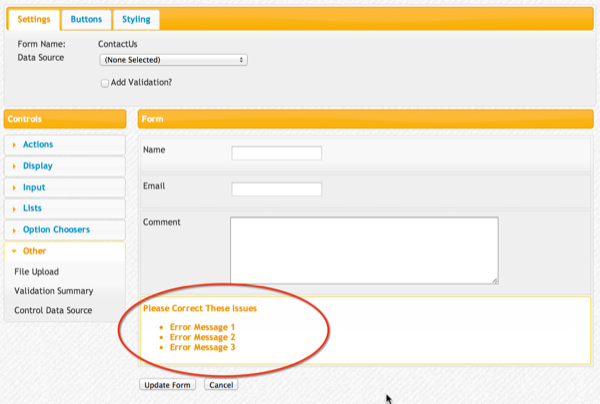
- Whoa! What's that big nasty error message? It's actually not an error. It's XMod Pro trying to be helpful. It has noticed that you added Validators to your form but you hadn't added a Validation Summary (remember, I said we'd talk about that later... it's now later).
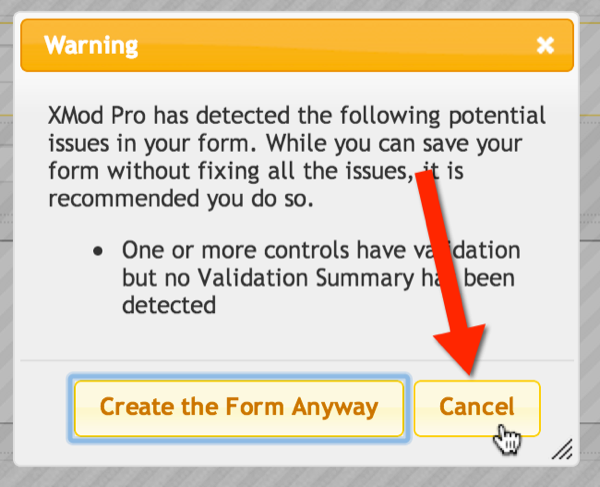
So, what is a Validation Summary. Quickly, it's a summary of all the validation errors that have occurred on the page. Many times, a form can fail several validators. The Validation Summary allows you to place all those Messages (remember the one's you entered when creating your Validators) in one spot - preferably near the "Submit" button the user clicks to submit the form. I'll show you what it looks like in a second. First, press the "Cancel" button to dismiss the warning.
- In the "Other" pane of the Controls toolbar, select Validation Summary:

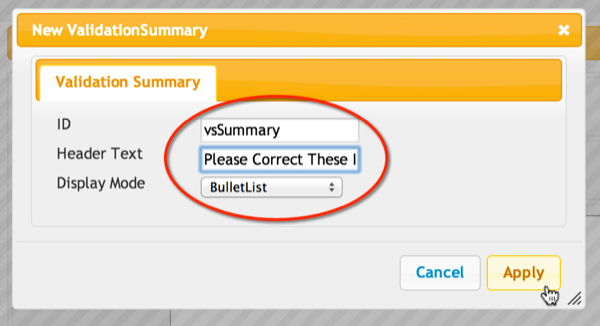
- Filling out the Validation Summary tag designer is simple. Give it an ID (I usually use "vsSummary"). This value should be unique on the whole web page. Also provide a Header Text that introduces the errors like "Errors:" or, as in this example, something a bit more friendly: "Please Correct These Issues". Finally click "Apply" to save your changes:
- The Validation Summary is not a visible control (unless validation fails). So, Form Builder displays it with its basic information:
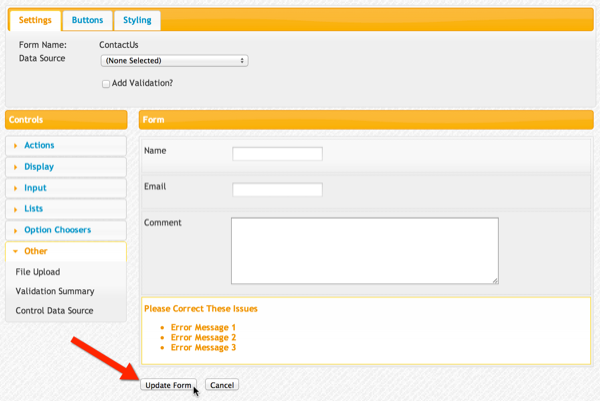
- Let's save our changes by clicking the "Update Form" button:
Previewing Our Form
If you're working on your form and making changes but don't want to make them public just yet, you can get an idea for how it will work using XMod Pro's built-in Preview function.
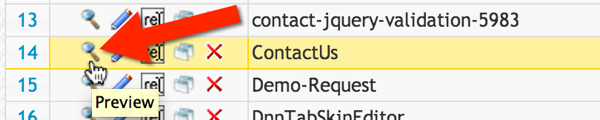
- To preview your form, find it in the Form Manager Grid and click the little magnifying glass icon next to its name:
- This will display the form in the form previewer.
There are a couple of things I'd like to point out:
- Not All Styles Are Represented: The preview only loads some basic stylesheets, so your form may not look exactly like it will at runtime
- No Data Is Harmed In This View: Data commands are not hooked up to the preview so you can rest easier while interacting with your form
- It's Alive! Did I say "Interact"? Yep. This is not a static preview like you might find elsewhere. You can type into the fields and even press buttons. Go ahead and press the Add button now
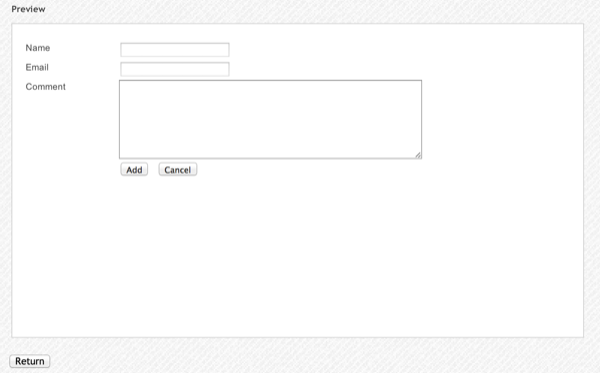
- If you followed my directions from step 2, your preview should now look like this (without the red arrows):
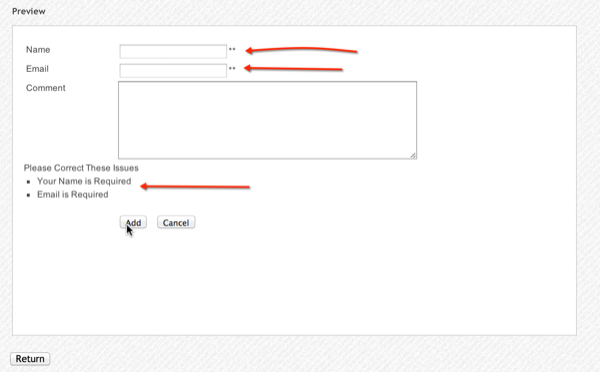
You can see that the validation works! The first two arrows are pointing to the "**" next to each of the invalid fields. The third arrow is pointing out the validation summary which contains our Error Messages.
- When you're done previewing your form, just click the "Return" button below the form preview area.
Our Validation works. This form is ready to go live on our site.... "But wait," you demand... "Even though we're validating the user's input, the data isn't being saved anywhere. If the user submits the form, the data will float off into the ether, never to be seen again". Very astute observation. While the form works it doesn't really *do* anything. How about we send an email to someone with the form's information?