Virtually every website needs a "Contact Us" form where users can provide their name, email address, and a comment/question. Typically this form will then generate an email that's sent to someone on the staff to respond to. In most cases, this data is not stored in the database so it's a great first project where we can focus on using XMod Pro's form building tools without being distracted by other features or functionality.
Getting Started with the Form Builder
I'm assuming you've added an XMod Pro module instance to your page.
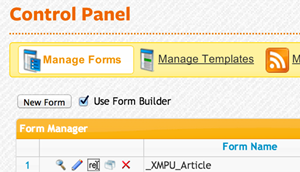
Go to the Control Panel and Click "Manage Forms"

This will bring up the Forms Manager Grid. Since we're creating a new form - and for you, this may be your first form, your grid may be empty. That's OK. All you need to do is make sure the "Use Form Builder" checkbox is ticked and click the "New Form" button.
Congratulations, you've just started the form builder - one of the easiest and quickest ways to develop a form for DotNetNuke. The Form Builder will even auto-create a form for you from one of your tables. However, since we don't need to store any content in the database, we're going to build a form ourselves and not attach it to any table.
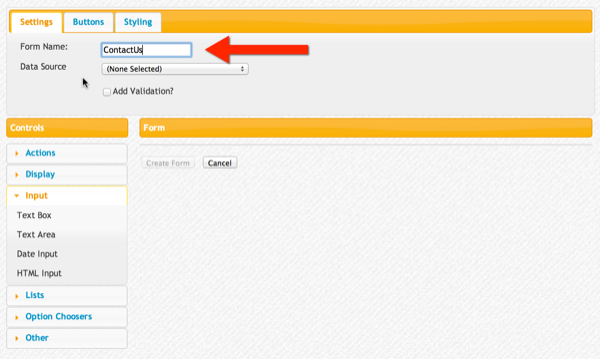
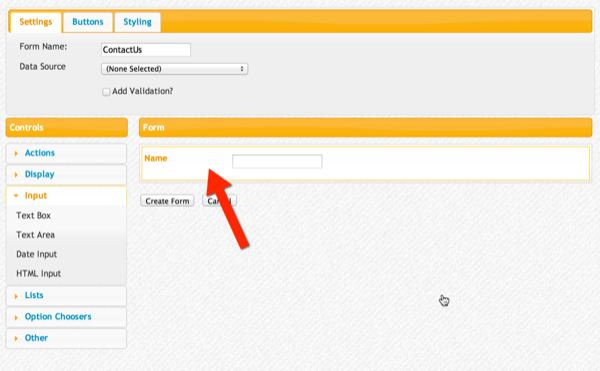
- First, let's give our form an easily recognizable name "ContactUs" Note that form names cannot contain spaces. You can use letters, numbers, underscores (_) and hyphens(-). I prefer to use CamelCase in most of my naming, but the choice is up to you:
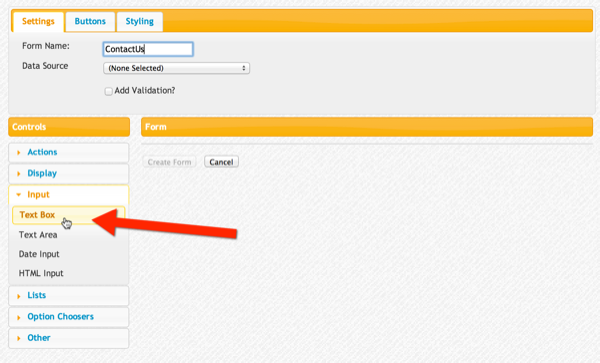
- Next, in the Controls Panel, open the "Input" accordion pane if it isn't already open and select the TextBox control:
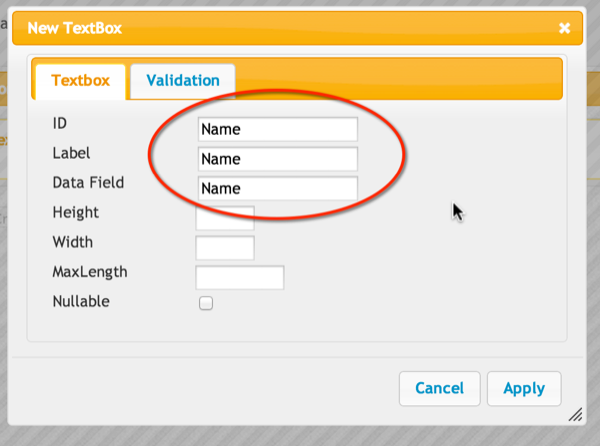
- You should now see something similar to the screen shot below. This is the tag designer for the TextBox control. Here is where you can set the control's properties like height and width as well as specify validation rules. For now we're going to focus on setting the required elements - the control's ID, Label, and DataField.
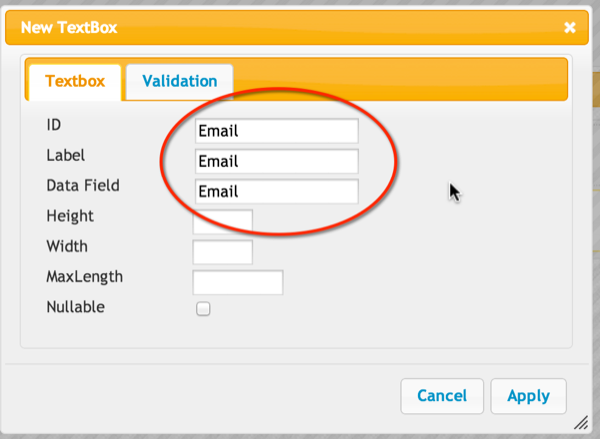
Control ID: This is a unique name for the control within the form. The ID must start with
a letter and can contain letters, number, and underscores (_) but no other characters. The ID is used by the Label, validation, and other internal processes of XMod Pro. Typically you'll see that the ID is the same as the DataField, but that is more for convenience and doesn't have to be the case.
Label: This is the caption the end user will see when they view your form. This can contain letters, numbers, spaces and other characters. It is good to provide a descriptive, but short value here.
DataField: This it the property you'll end up using the most. This is how XMod Pro tracks the value from the control and shuttles it around. It effectively binds the control to your data. It is also used even if you're not sending the data to the database. In fact, you'll end up using it when sending emails from your form later in the lesson.
In the example below, we've set the value for all three properties to "Name" since we'll be using this TextBox to accept the user's name.
- Once you've filled in the ID, Label, and Data Field, click the Apply button in the bottom right corner of the tag designer. You'll now see that the TextBox has been added to your form's "canvas". The canvas allows you to see what controls you've added, re-arrange them by dragging and dropping them, edit them, and even delete them.
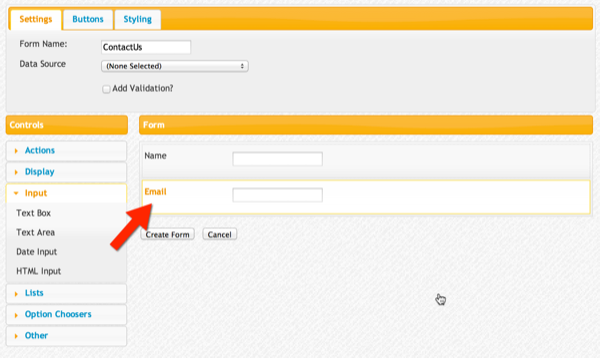
- Now, let's add a textbox to capture the user's Email address. The process is the same. From the controls toolbox, select "Text Box" from the Input panel. Fill out the tag designer as you see below and click the Apply button.
- You canvas should now look like this:
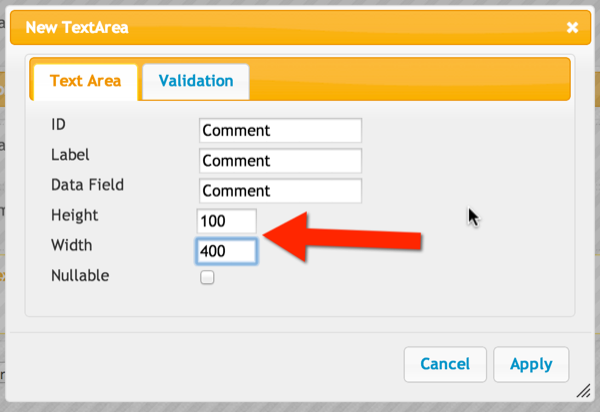
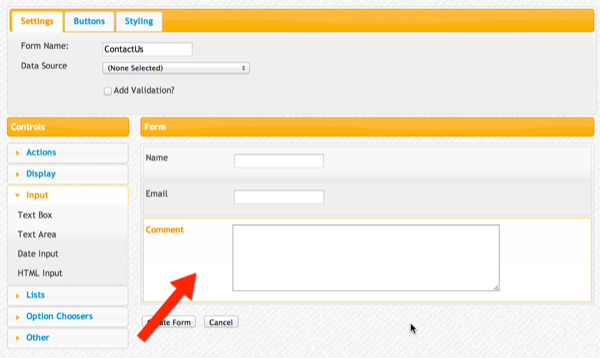
- Our last control will enable users to enter free-form, multi-line text into our form. So, we'll choose a TextArea. The process is the same. Choose "Text Area" from the Controls toolbar and fill out the tag's designer with the information below. Notice the arrow. Not only are we filling in the required ID, Label, and Data Field properties, but we're also specifying the dimensions of the TextArea. Here we've defined it as 100px tall and 400px wide:
- Once you've clicked the Apply button, your form canvas should look like this:
- All we have to do now is click the Create Form button (just underneath the form canvas) and XMod Pro will generate our form and take us back to the Form Manager Grid:

So, you've created your first form. What do you do now?
- Configuring your module to use your new form
- Adding validation to your form
- Adding some style to your form