Welcome to the Learning Center
The Guide | Knowledge Base | FAQ
Browse it all or refine your selection using the filters below on the left.
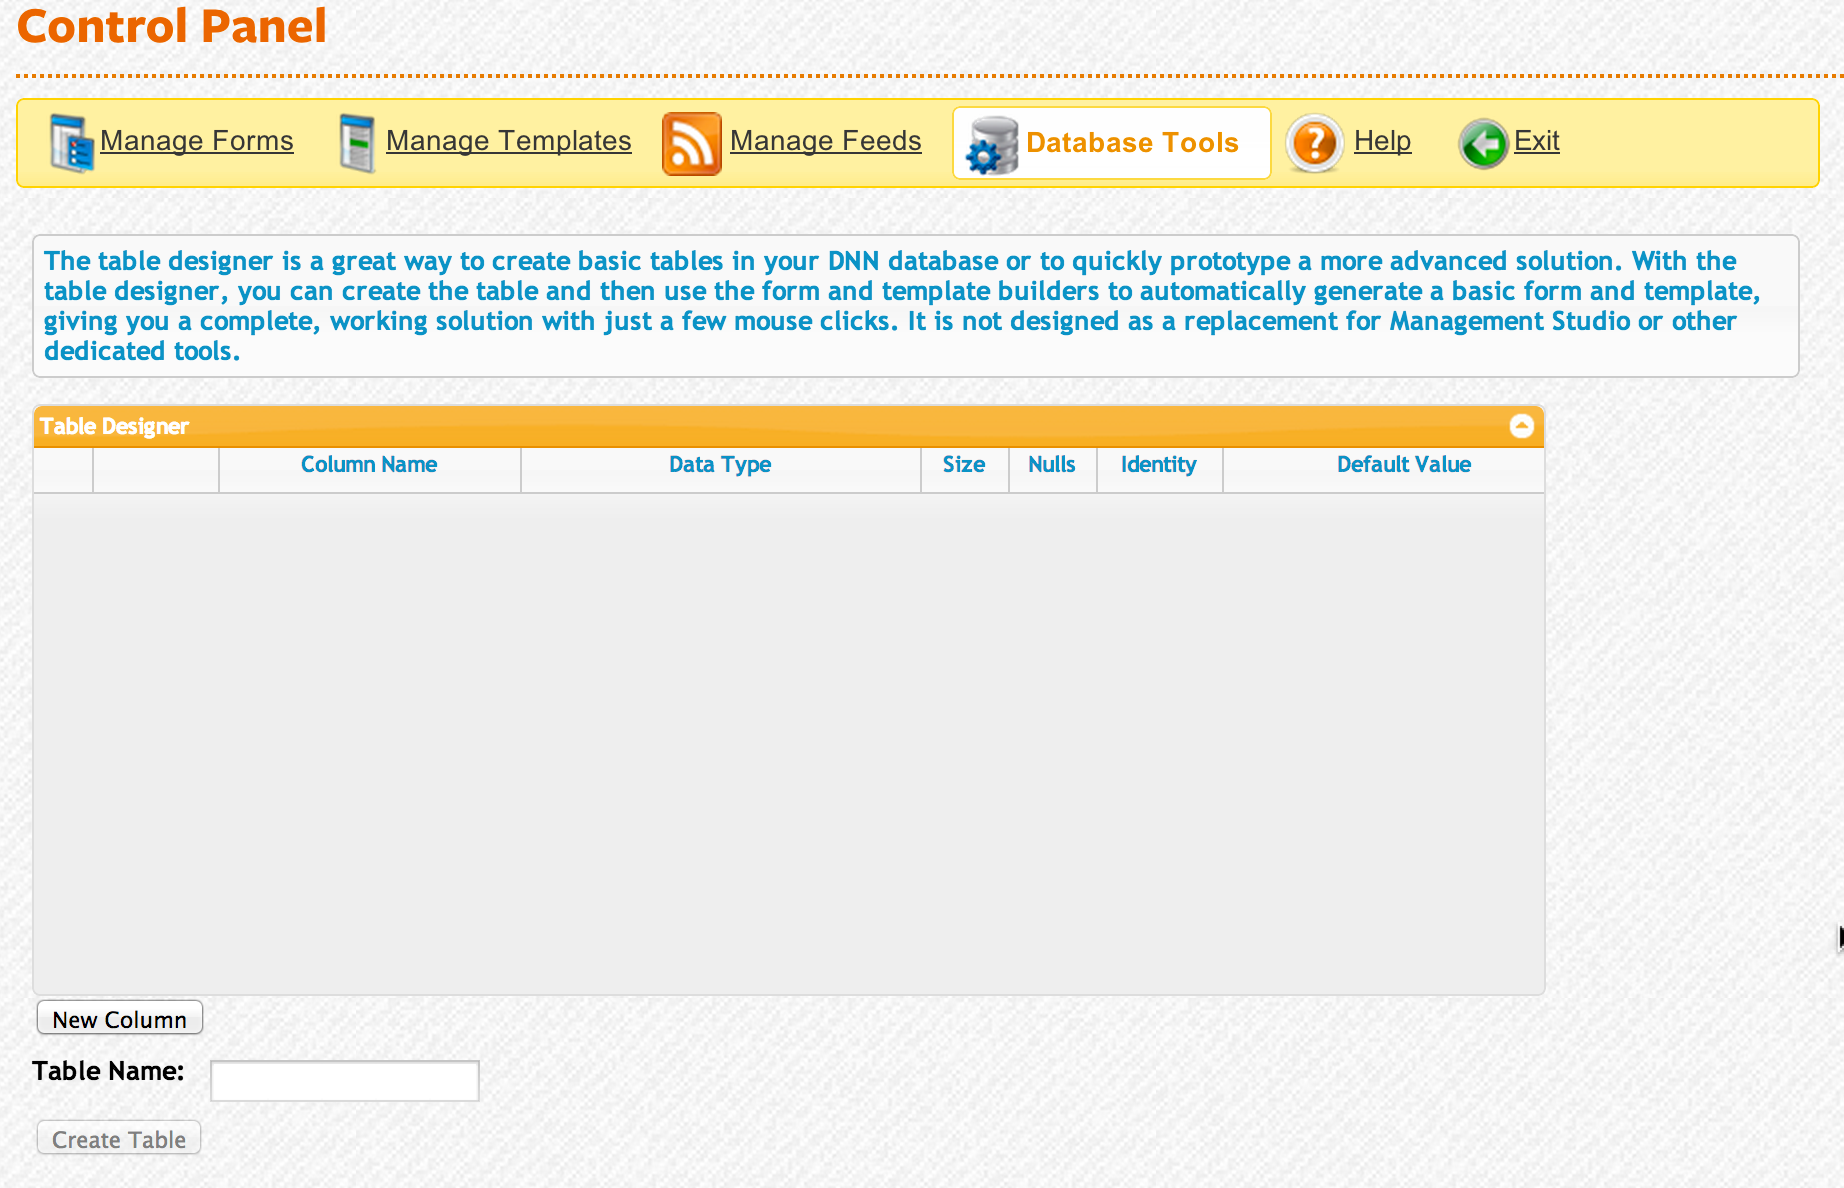
Sometimes you need to get a prototype ready for a client by this afternoon, or you just want to experiment with building some functionality. XMod Pro's Database Tools page can help you put together a table or two in practically no time at all. Keep in mind that this tool isn't a full-fledged database management tool. It is designed for quick prototypes or one-off solutions. For production, we recommend using a free tool like Microsoft's SQL Server Management Studio Express or your host's supplied tools for creating tables because they allow you to edit existing tables, add primary keys and setup indexes.
With that said, let's build a table to backup our Contact form that we built in the form section of this guide. If you recall, it was a pretty simple form that gathered a visitor's Name, Email address, and comments and then sent an email notification. It didn't store any of its data in the database so there was no record of the contact request other than the email notification. So, this table will store the submitted information for later viewing.
- From the Control Panel, select Database Tools. This will bring up the Table Designer.
- Just below the grid, click the New Column button
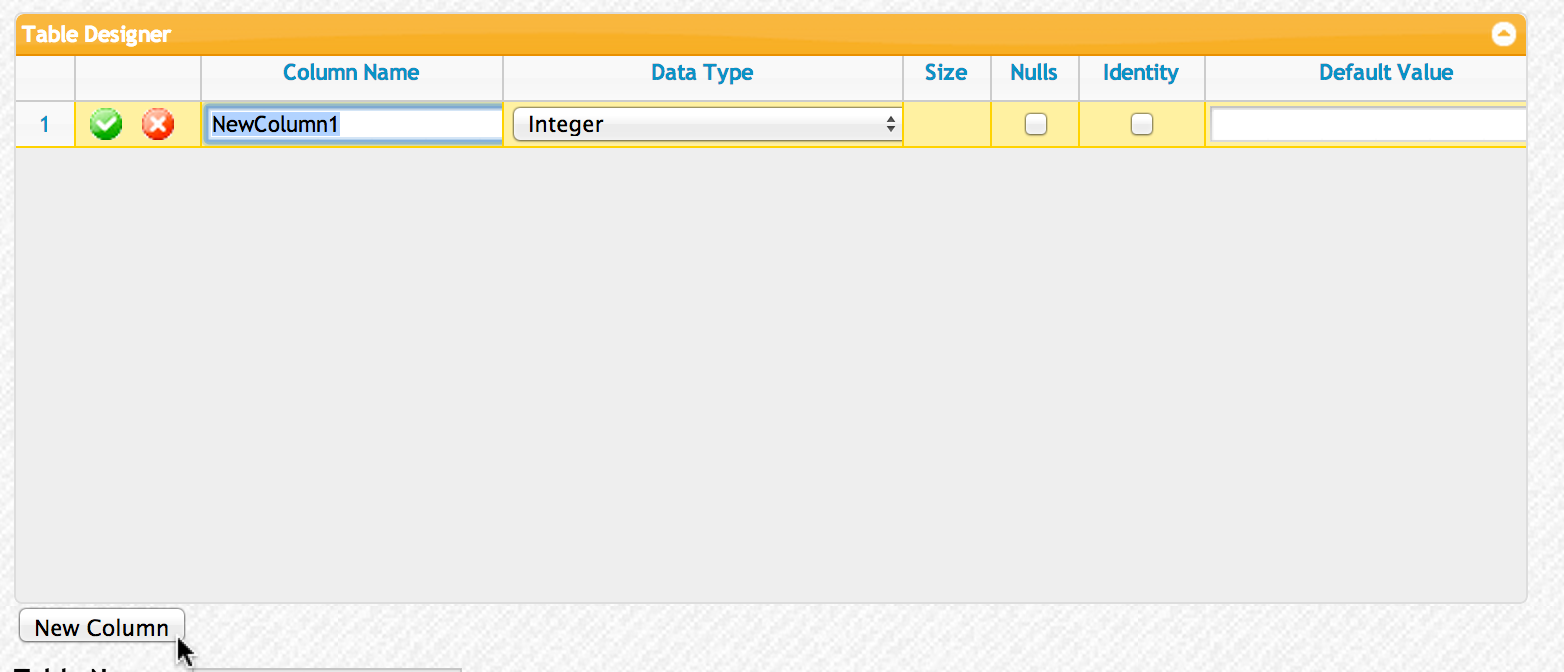
XMod Pro adds a new row to the grid, prepopulated with some defaults.
- Replace the "NewColumn1" with ContactId
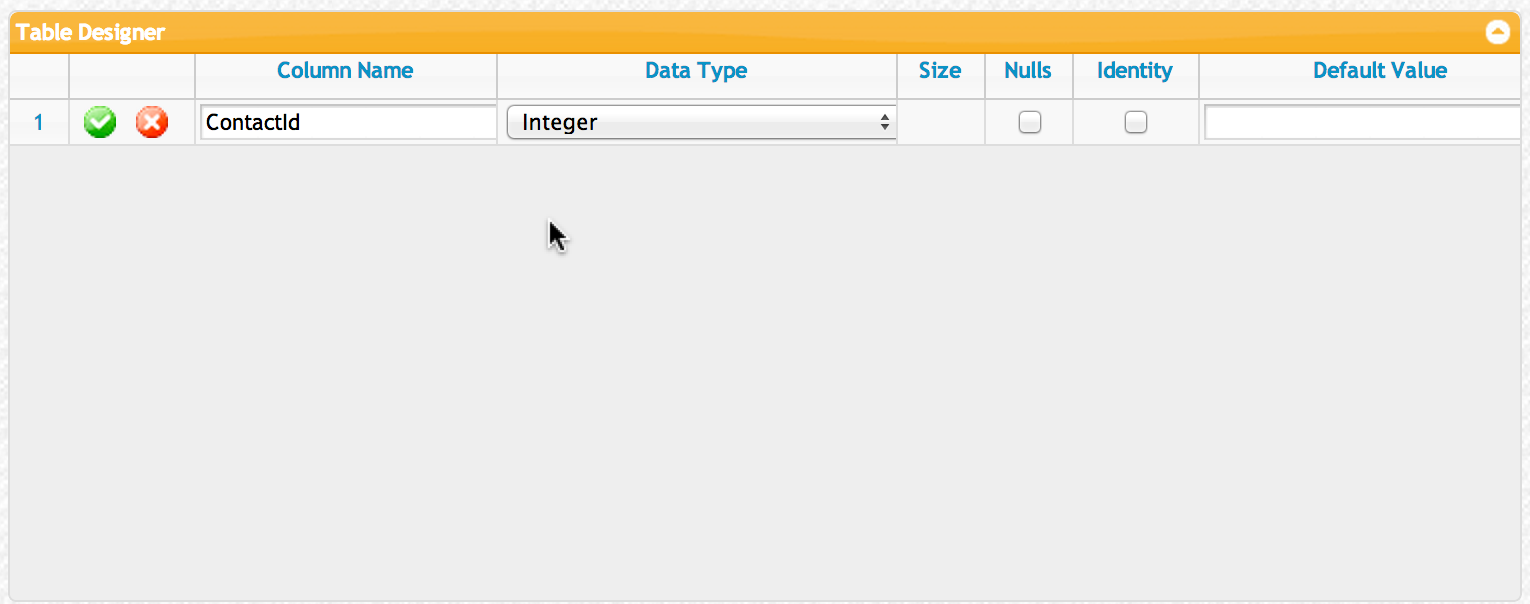
Why are we adding a ContactId column? That's not on the ContactUs form anywhere. When creating database tables, you usually want to have a way of uniquely identifying each record since people can have duplicate names and emails and even comments. The ContactId will be a number that gets auto-incremented so it will always be unique. This type of column is almost always a good thing to have on your tables.
- Click on drop-down list in the Data Type column of the grid to see the different types of data XMod Pro supports in your database tables.
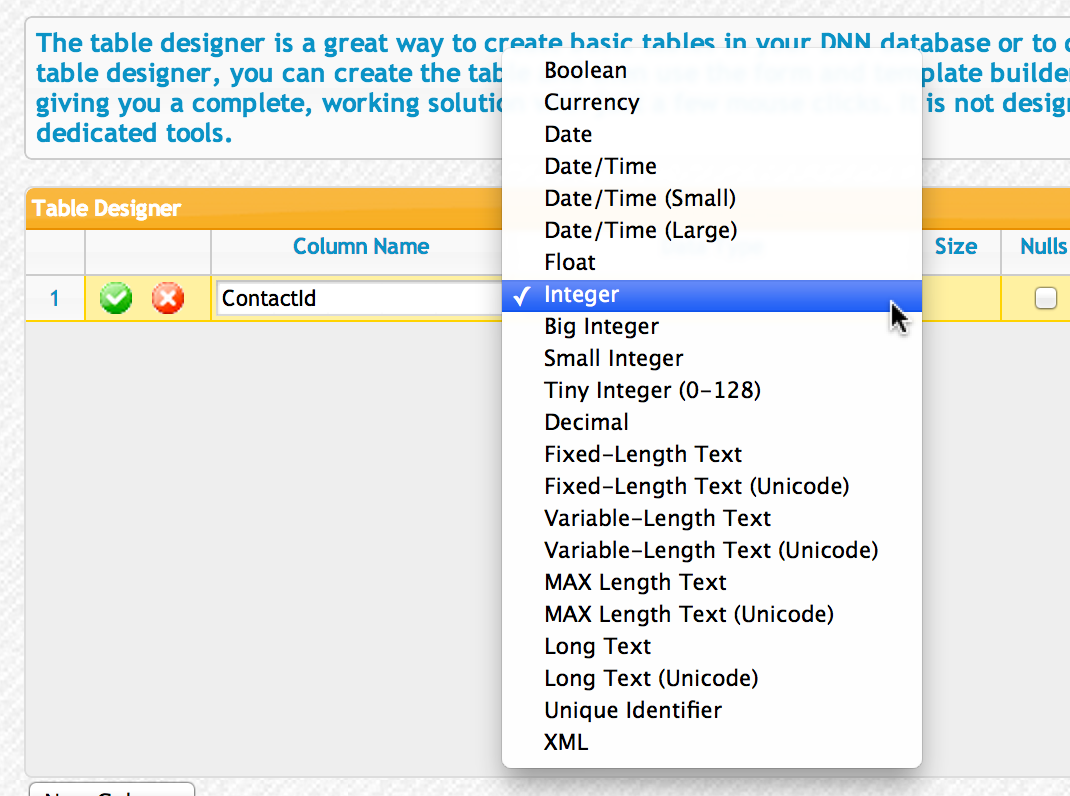
In this column, though, we actually want the default data type of Integer. This means the column will store numeric values that are whole numbers (i.e. no decimal points). Numbers could be positive, negative, or 0, but in our case they will always be positive. So go ahead and click the Integer data type and we'll move on.
- The next set of columns may be enabled or disabled based on the type of data your chose. In our case, the Integer data type does not require a Size attribute (that is reserved for text values). Instead, click on the Identity checkbox.
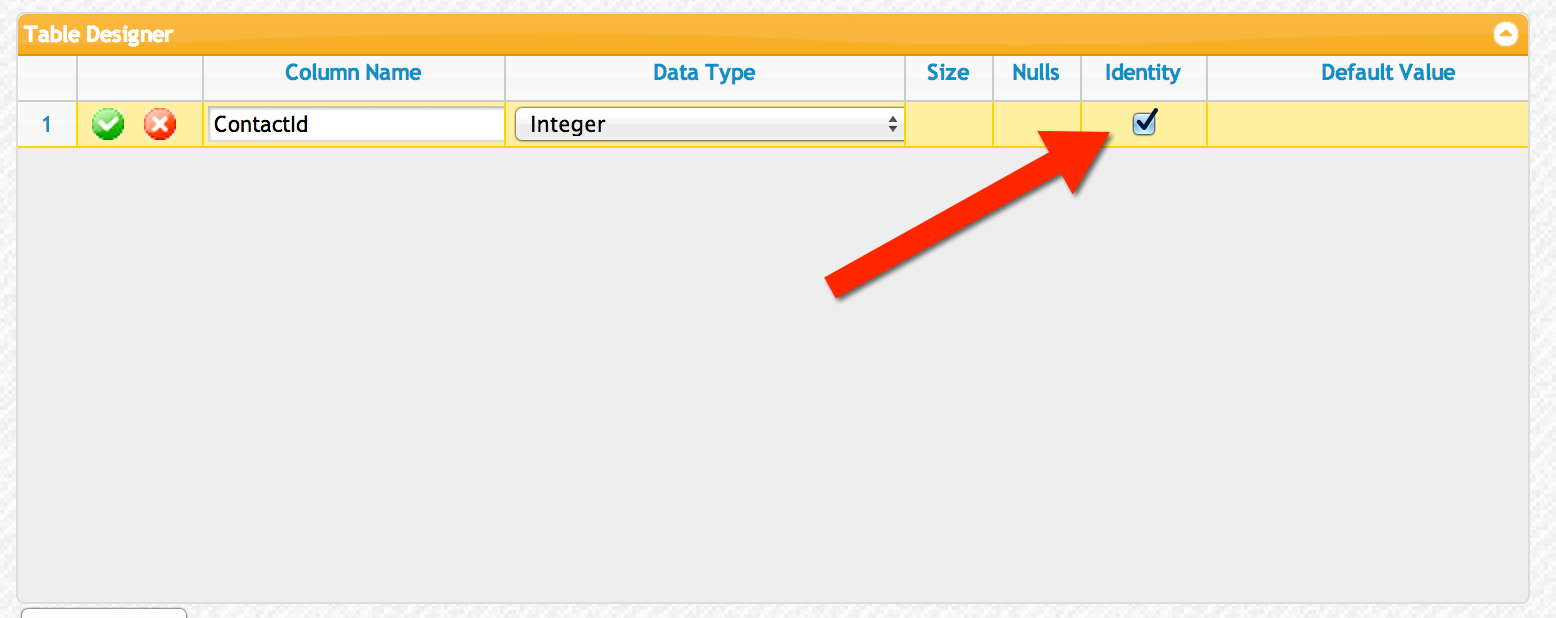
An Identity column is one that stores a number and auto-increments that number each time a record is added to the database. The Table designer will automatically set it to start at 1 and increment by 1 with each new record.
- Finally click the green checkmark button to the left of the row to save your changes.

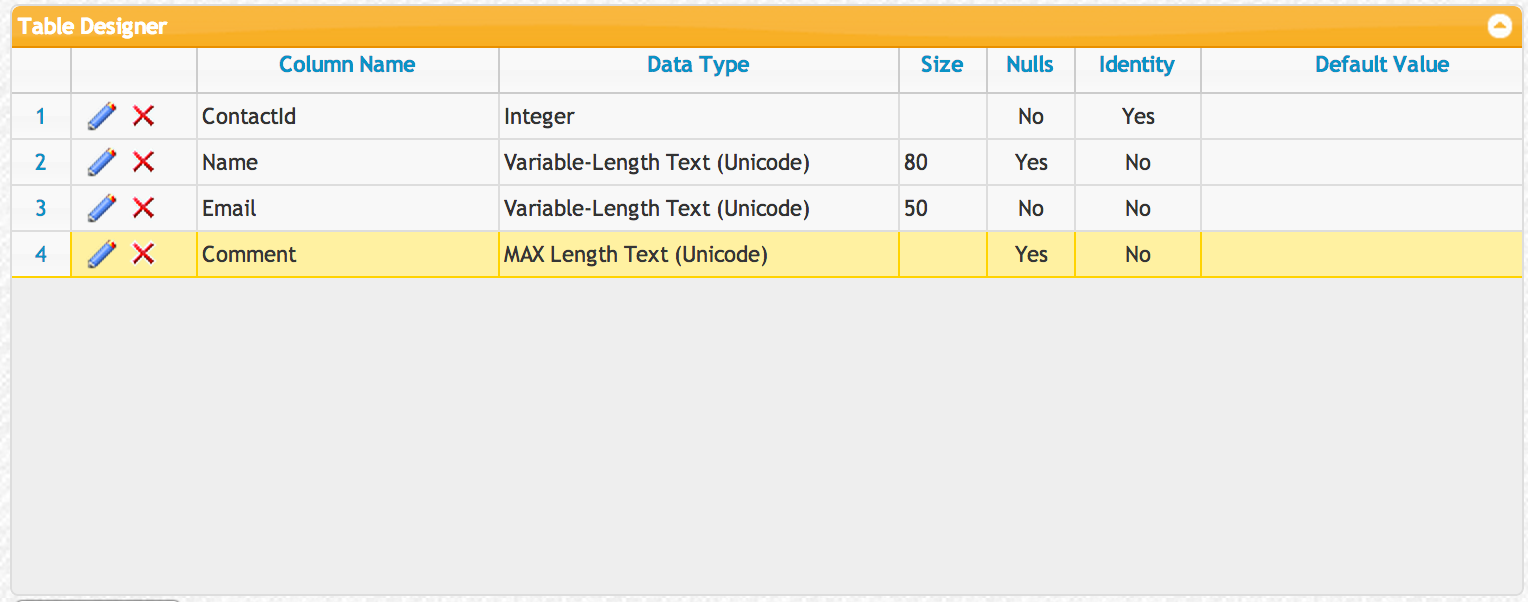
- Create the rest of your columns. Rather than laboriously step you through the creation of each column, simply follow the same procedure we did above, filling in the information as you see below.
Let's explain a couple of items that may not be clear if you're new to databases:
- Variable length text: We've set our text columns to variable length text. This is a more efficient way of storing text in the database. Fixed length text always reserves the same number of characters regardless of the actual content. So, a 20 character fixed length field will still take up 20 characters even if the content is "hi".
- MAX length text: Isn't variable length text enough? Well, for certain fields like a person's name or an email address, you can specify a variable-length text and give it a maximum size (like 80 characters for the Name and 50 for the Email as we've done here). However, if you want to allow your users to ramble on a bit and you think they may REALLY ramble, you can use the MAX length which tells the database to store any and all text the user enters. It's not efficient to do this for all your text fields - but for those like the contents of an article or a user's biography, you may want to use it. Note that the MAX length only works on SQL Server 2005 and later.
- Unicode: Many Americans who aren't programmers probably have never heard of Unicode. Put simply, if your application will ONLY be used by English-speaking Americans in the United States, you may consider not using Unicode. However, if there's a chance that anyone in Europe, Mexico, or anywhere else in the world will use your app (and that's pretty likely), you should use Unicode. This allows the database to store all the extended characters that non-English languages have. So, it's usually a safe bet unless space is at a premium.
- Size: We mentioned size earlier. It is used for text fields, either to specify the constant length of the field (for text or char type fields) or the maximum number of characters allowed as in variable length fields. It is not needed for numeric or date fields or even for MAX lengthe- fields.
- Nulls: What the heck is a null? Basically, if something doesn't have a value it contains Nothing. In database-speak, you can refer to Nothing as Null. It is different than an empty string or 0 and is often used to indicate a field hasn't been touched or updated. When using Nulls, you typically have to take other steps in your forms to work with null values. In XMod Pro, it's just a property you add to your controls, but it's an extra step to take if you don't need to.
- Default Value: If a new record does not contain a value for a column that has its default value set, the default value will be inserted. We aren't using this feature in our table.
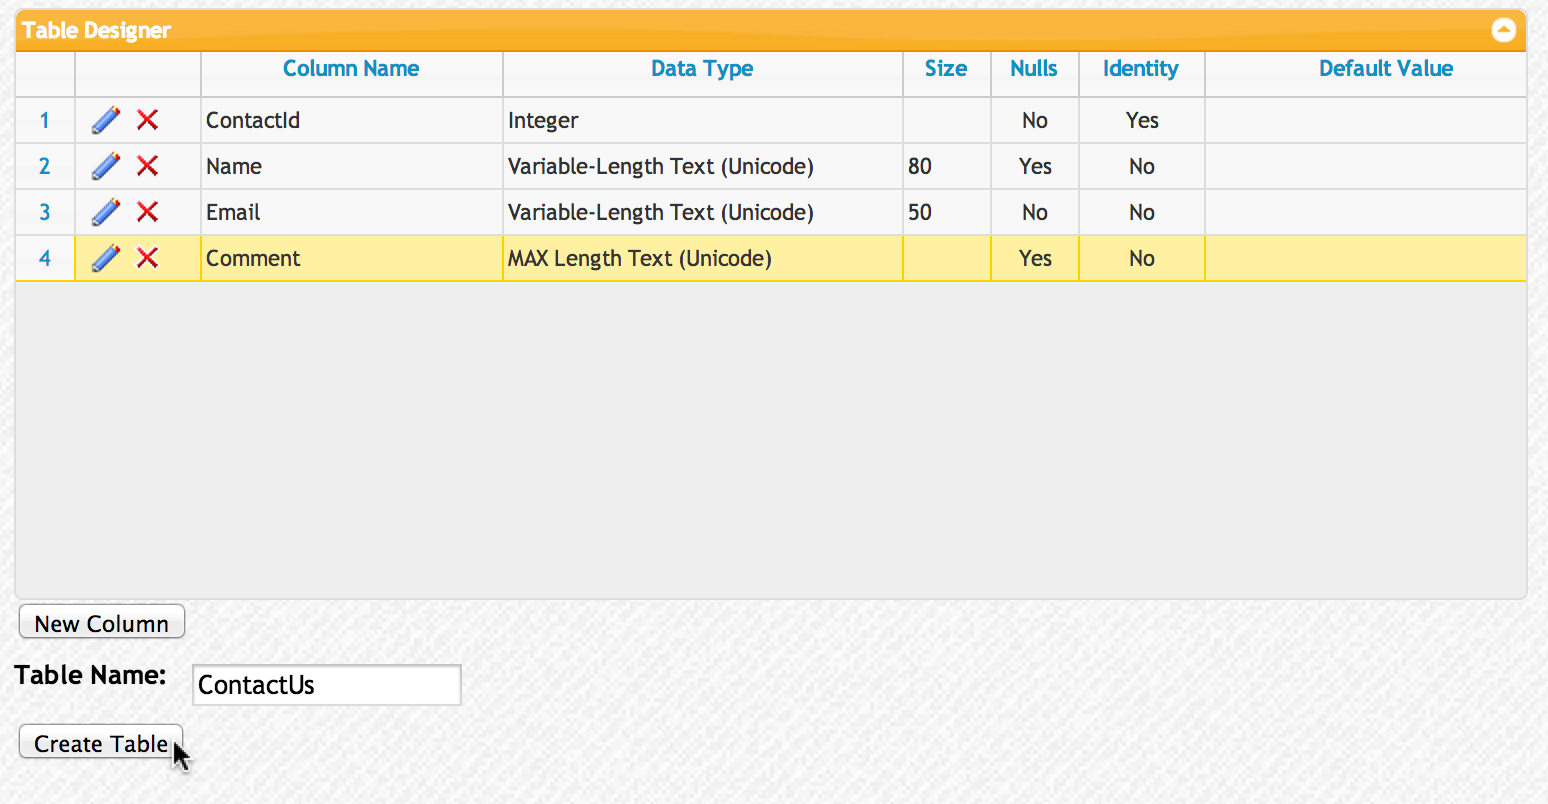
- After you've reviewed your column definitions, type your table name in the appropriate field and click the Create Table button
XMod Pro will pop-up a dialog letting you know if the table creation process was successful. If so, you're done.